If one more holiday Instagram reel makes you feel like a failure, this one’s for you.
The kids are bouncing off the walls, your coffee’s gone cold (again), and you’re surrounded by 47 kinds of glitter. Sound familiar?
Let me say it louder for the moms in the back: It doesn’t have to be perfect.
Your house doesn’t need to sparkle in every corner — because with these Christmas paper crafts for kids, it’s your child’s eyes that will be sparkling.
And that is what actually matters.
This list has something for every kind of creative kid — and every kind of tired, well-meaning, totally-winging-it parent.
You don’t need a craft room, a glue gun collection, or Martha Stewart’s DNA. Just some colored paper, scissors, tape, and maybe a glue stick that hasn’t dried up since last Easter.
If this is your first time crafting with paper — or your supply drawer looks like a glittery war zone — don’t stress.
Here’s your go-to checklist to make sure you’ve got everything you need for smooth (and actually fun) crafting time with the kids.
I like to call it: The Dollar Store Creative Kid Starter Kit.
Because yes, you can make magic on a budget. 👉 👉 👉The Dollar Store Creative Kid Starter Kit
These Christmas paper crafts for kids are simple, sweet, and surprisingly un-boring — even if you’ve done some of them before.
So scroll through, pick what fits your mood (or patience level) today, and make some magic with what you already have in the drawer. Bonus points if you don’t lose the scissors halfway through.
- Adorable & Easy DIY Christmas Garland Ideas Kids Will Love – Christmas Lights, Christmas Tree, Christmas Cupcake
- Low-Prep & Fun DIY Paper Cup Christmas Crafts for Kids – Santa, Snowman, Reindeer
- Simple & Sweet DIY Christmas Angels Made from Paper
- Meaningful Christmas Handprint & Fingerprint Keepsake Crafts – Christmas Lights, Christmas Tree, Snowman
Ready for more festive fun? 👉 Click here for: 10 simple and joyful Christmas tree paper crafts for kids — the kids are guaranteed to love them!
When my girls were little, Christmas meant one thing: chaos wrapped in tinsel.
There were paper scraps stuck to the dog, glitter in my coffee, and more meltdowns than I could count (and not just from the kids).
But tucked inside all that mess were some of our most magical memories — ones that still come up today, now that they’re both young adults with lives of their own.
Back then, I wasn’t a family coach or a social pedagogue. I was just a mom, trying to survive December with my sanity mostly intact. And craft time? That was our quiet moment. Our silly, sticky, imperfect, heart-full time together.
Today, I get to work with other families — helping them navigate these beautiful, bonkers years. And if there’s one thing I always say, it’s this: don’t underestimate the power of a paper snowflake, a glue stick, and ten minutes of undivided attention.
(Also: don’t underestimate how long it takes to get glitter out of carpet. Trust me. 😉)
1. Adorable & Easy DIY Christmas Garland Ideas Kids Will Love
Christmas Light garland
This Christmas paper craft for kids is easy, colorful, and perfect for all ages (a.k.a. minimal supervision required).
What you’ll need:
- Construction paper in classic Christmas colors (red, green, yellow, blue, white, purple) + black
- Pencil (for tracing)
- Safety scissors
- Glue stick or glue dots
- String, ribbon, or yarn (to hang your lights)
👉 Check out the video if you’d rather watch than read — or if you’re just curious how fast this craft actually comes together.
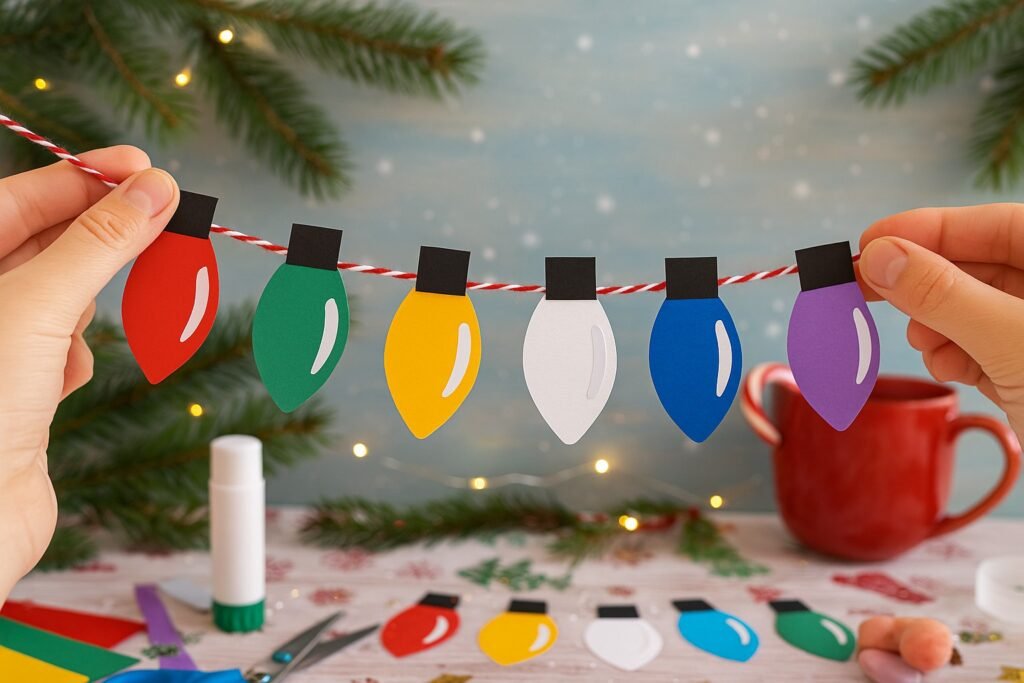
- Fold a piece of colored construction paper in half (red, green, blue, etc.).
- Draw a light bulb shape on one side and cut it out to get a symmetrical piece.
- Cut a small black rectangle and glue each end of the bulb to the sides of the rectangle (like a sandwich).
- Add a white curved strip of paper to one side of the bulb to create a light reflection.
- Repeat the steps using different colors and use the first bulb as a tracing template.
- Fold the black tops over a string or yarn and glue or tape them to attach.
- Hang your garland on a wall, window, or above the fireplace – and enjoy the festive glow!
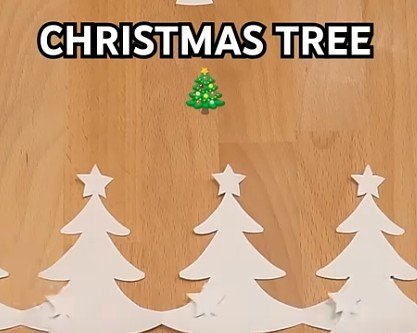
Christmas tree Garland
Here’s another fun idea: a Christmas tree garland!
We used different colorful papers that match the holiday vibe — even tried it with glitter paper (because why not?).
The kids loved decorating the trees with tiny stars and a generous amount of glitter.
It’s simple, festive, and perfect for hanging across a window or wall.
Check the short video how easy to make it.
Christmas cupcake garland
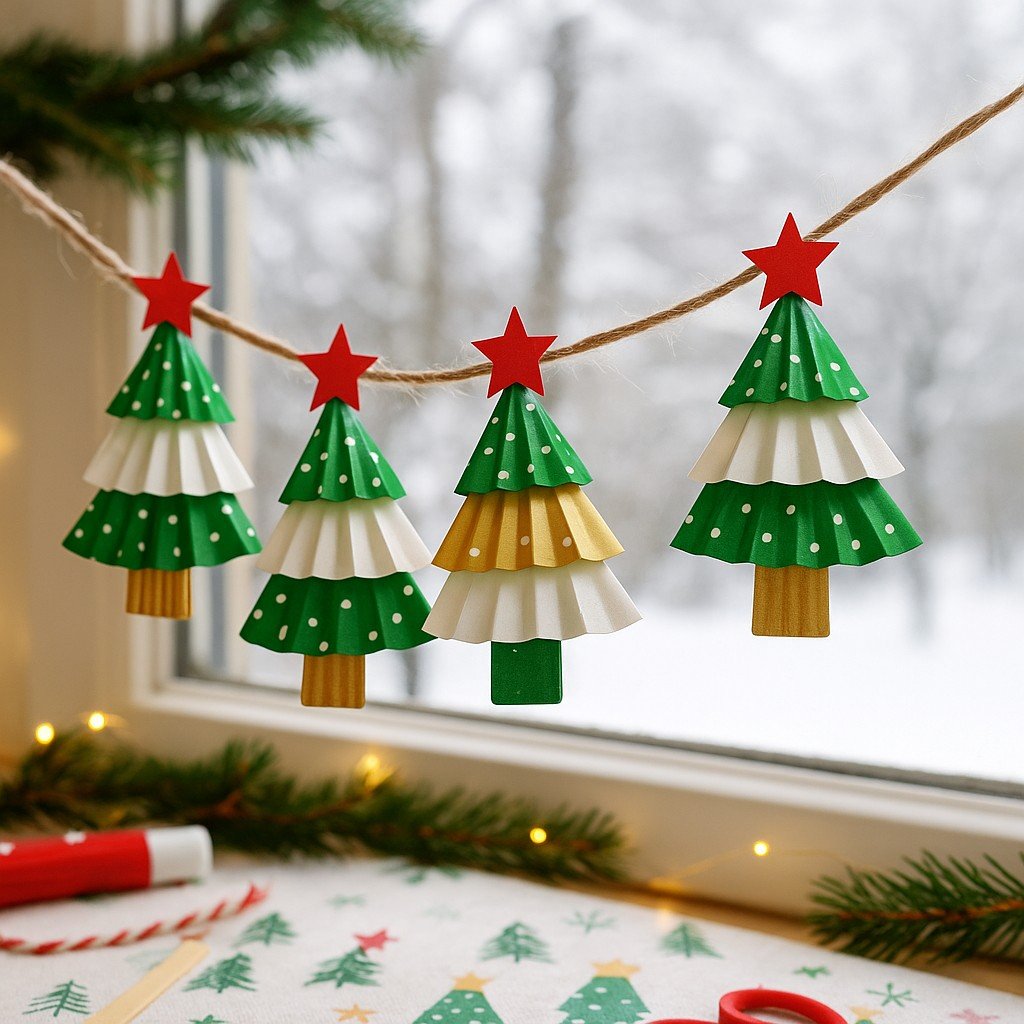
- 1. Fold the cupcake liners
- Flatten each cupcake liner completely, then fold it in half, and then in half again to make a triangle-like shape. Do this with all three sizes/colors. Layer them from largest to smallest to create a cute tree shape, and glue them together to hold the layers in place.
- 2. Add a star on top
- Pop a gold star (or any little topper) on the top of each tree. Don’t worry if there’s a bit of extra glue showing — it’ll dry clear and no one will notice. Promise.
- 3. Measure and space your trees
- To keep your garland looking neat and balanced, use a measuring tape to space out each tree before attaching it. 20 cm (about 8 inches) apart works nicely, but feel free to adjust.
- 4. Tape or glue to the string
- Secure each tree to your pretty string or festive ribbon using tape or a dab of glue at the back. Lay it out first to plan the order and spacing before sticking them down.
- 5. Drape & display
- Once you’re happy with the layout, hang your garland on a window, mantel, wall — anywhere that needs a little holiday magic. You can make it short and sweet or go full holiday extravaganza.
- Bonus idea: Got a few extra paper trees? Stick them on blank cards to make adorable homemade Christmas cards — because you’re crafty and thoughtful.
And look what I found! I mean… these Christmas cupcake liners are so cute, you’ll want to craft with them and bake in them — and still have leftovers.
Seriously, you can use them for garlands, ornaments, gift toppers… or, you know, actual cupcakes.
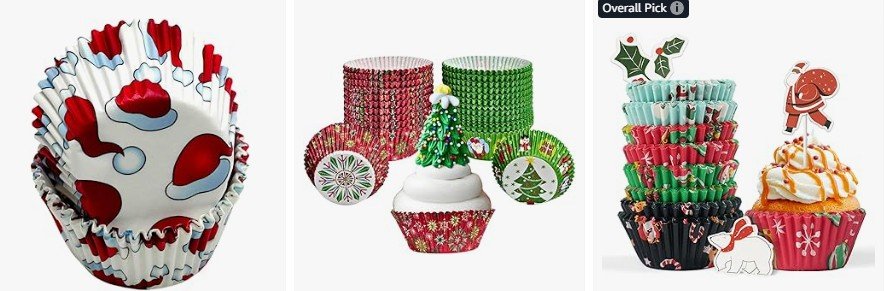
(Amazon)
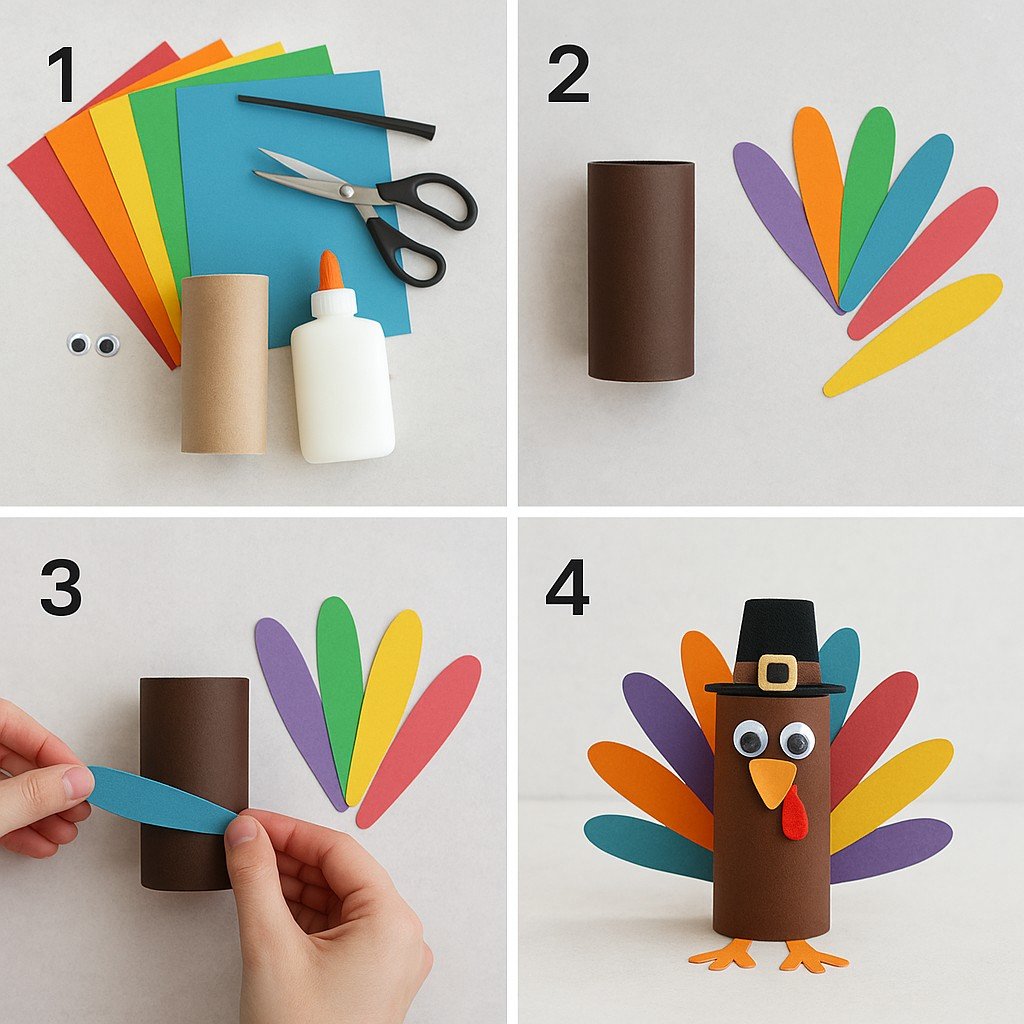
2. Low-Prep & Fun DIY Paper Cup Christmas Crafts for Kids
If you’ve got a stack of paper cups leftover from a birthday party (or that random pack you bought in 2018 and forgot about), this one’s for you.
These Christmas paper cup crafts are ridiculously easy, surprisingly fun, and — bonus! — actually help your kids work on their fine motor skills, creativity, and ability to follow steps without melting down. (Well, most of the time.)
From reindeer to Santa to an entire snowman family, you can turn a humble cup into just about anything with some paper, googly eyes, and glue.
They’re perfect for table decorations, small gifts, or just something to keep little hands busy while you tidy up the kitchen for the fifth time today — or finally drink your tea while it’s still warm. No screens, no overstimulation, just old-school creativity (and maybe a little glitter on the dog).
Let’s dive into a few of the cutest (and easiest-to-clean-up-after) ideas.
paper cup Santa
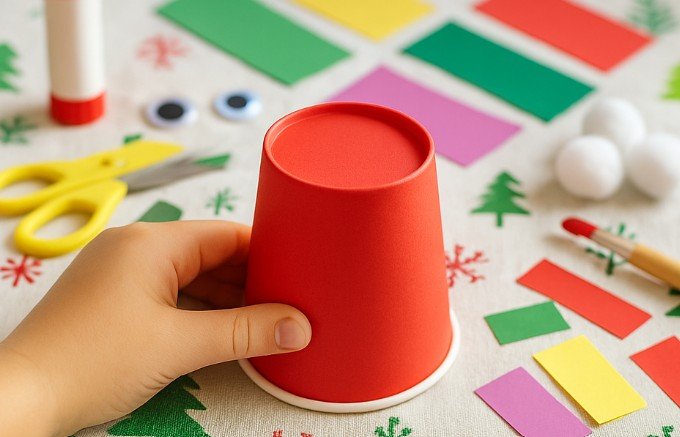
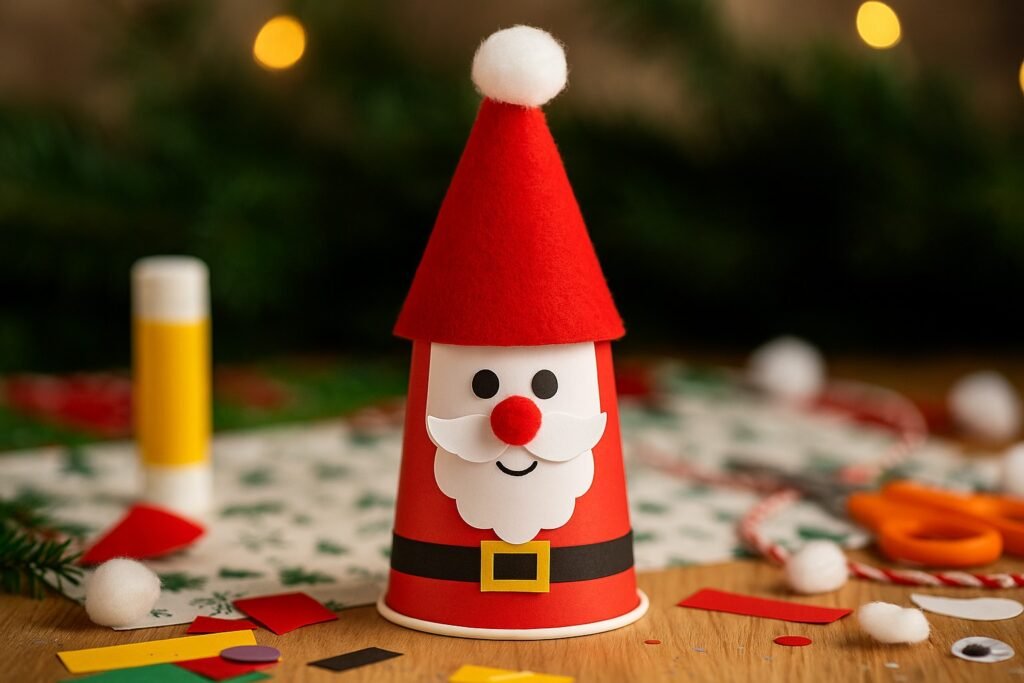
- Take a red paper cup — or paint a plain white one using kid-safe, washable red paint. Let it dry completely before moving on. This will be Santa’s body, so go as bright and jolly as you like!
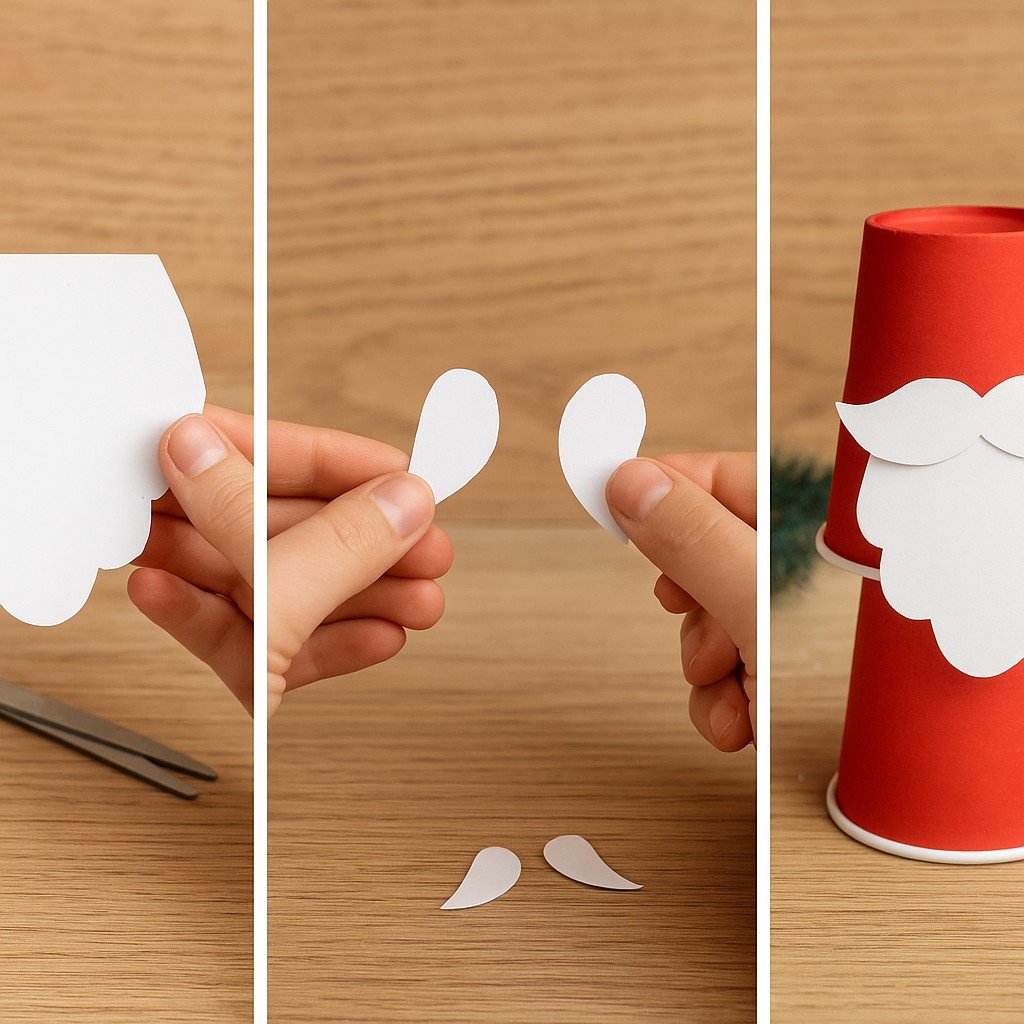
- Cut a beard shape and two mustache pieces out of white paper. The beard should have rounded scallops, and the mustache can be two teardrop-like curves. Glue them onto the red paper cup – beard first, then the mustache pieces on top or in the middle.
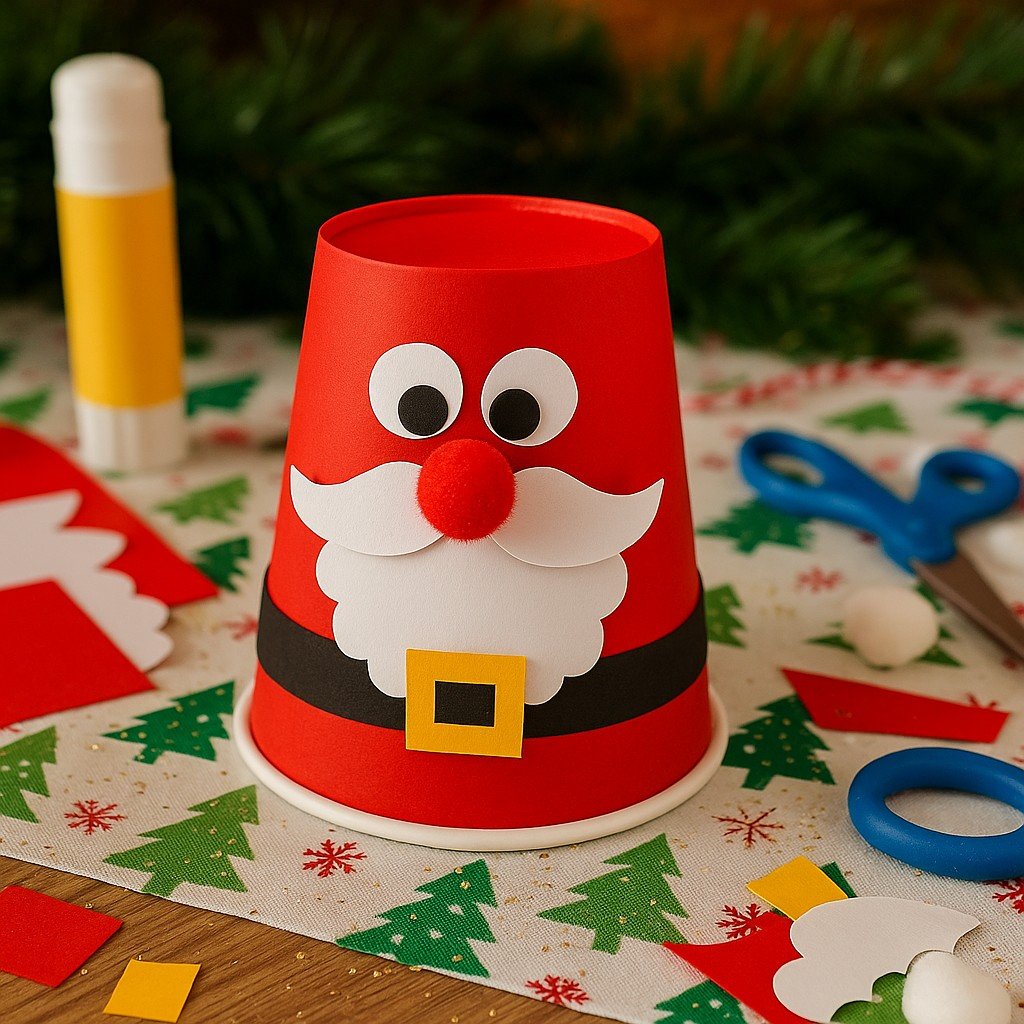
- Glue or draw on two black eyes and a red nose — a pom-pom works great if you have one!
4. Then wrap a thin strip of black paper around the bottom of the cup for Santa’s belt.
5. Finish it off by adding a yellow paper square as a belt buckle (optional: cut out a smaller black square inside for extra flair).
6. Cut a red felt or paper half-circle, then roll it into a cone shape and glue the edges together. Once the glue sets, attach it to the top of Santa’s head — right above the eyes and mustache. Add a cotton ball to the tip for extra fluff!
paper cup snowman
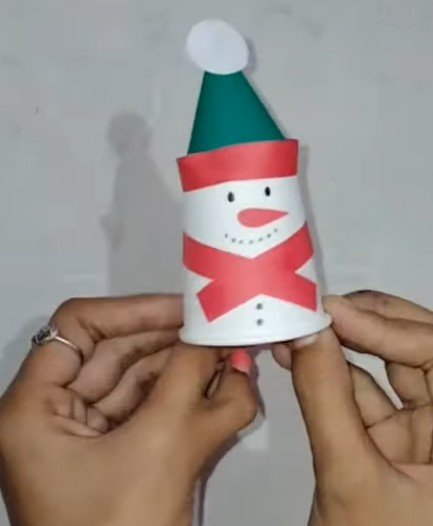
Check this video for 👉👉👉 Simple and cute Snowman
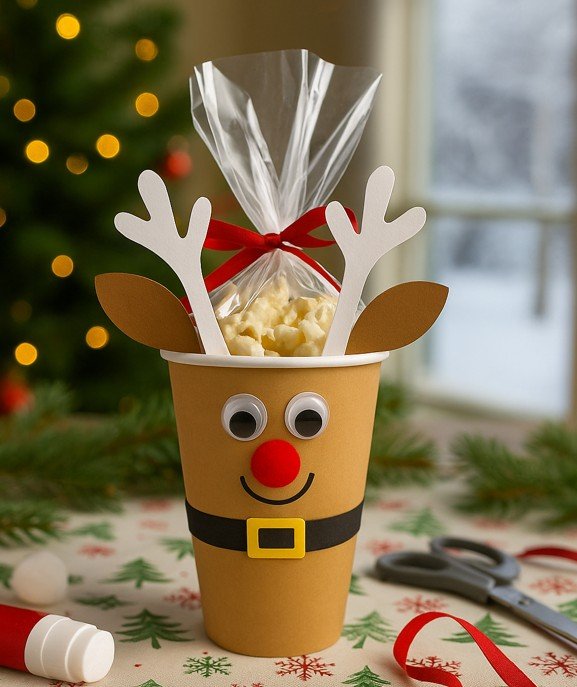
paper cup reindeer

What you’ll need:
- Brown or beige paper cup
- Brown and white construction paper (for ears and antlers)
- Black and white paper or googly eyes
- Small red or black pom-pom (for the nose)
- Black marker
- Glue stick or craft glue
- Scissors
- Small treat bag + ribbon or twine
- Candy, popcorn, or small treats to go inside
Step-by-step:
1. Make the antlers and ears:
Cut out two reindeer antlers from white paper and two inner ears from brown paper. Glue the brown ears slightly lower than the antlers on the inside rim of the cup.
2. Add the eyes and nose:
Glue on googly eyes or use paper cutouts. Then stick a red pom-pom for Rudolph’s nose (or black for a regular reindeer). Cute either way!
3. Draw the mouth:
Use a black marker to draw a simple smiling mouth. You can also add eyelashes if you want to make a “girl” reindeer — totally optional, totally adorable.
4. Fill the cup:
Add your favorite treat (popcorn, chocolates, mini cookies) into a clear plastic bag. Tie it with ribbon or twine and pop it inside the cup so it peeks out like hair behind the antlers.
5. Optional upgrade:
Stick a small gift tag on the front or hang one from the ribbon — and boom, you’ve got a gift, decoration, and sugar-delivery system in one.
When my daughters were little, December was pure glitter-fueled chaos. I’d try to keep things calm with crafts — and by “calm,” I mean a 10-minute window where no one was arguing over scissors.
We made these little reindeer cups one snowy afternoon when they were maybe five and nine. I remember them giggling uncontrollably as they stuffed popcorn into the treat bags — and also into their mouths, obviously. At some point, our dog ended up with antlers on his head, and someone drew googly eyes on the kitchen cabinet. (It’s still kind of funny.)
But you know what? We kept two of those cups for years. They got a bit squished in the decorations box, but every December they made a comeback — and so did the memories.
Now that they’re grown, those little reindeer are long gone. But the joy we shared while making them? Still very much here. ❤️

If you love keeping things organized and holding onto the memories, grab your FREE 32 page printable Christmas Planner PDF to make this season simpler, sweeter, and a little more magical.

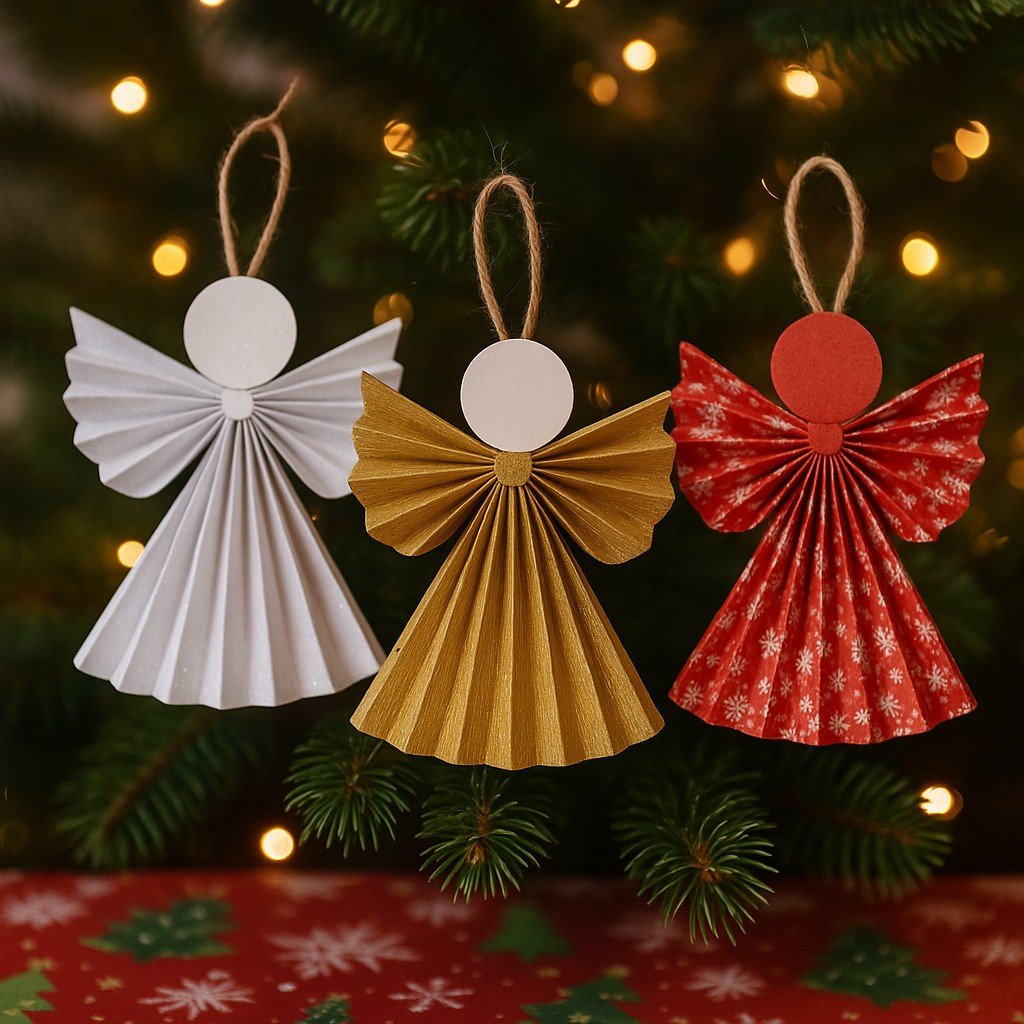
3. Simple & Sweet DIY Christmas Angels Made from Paper
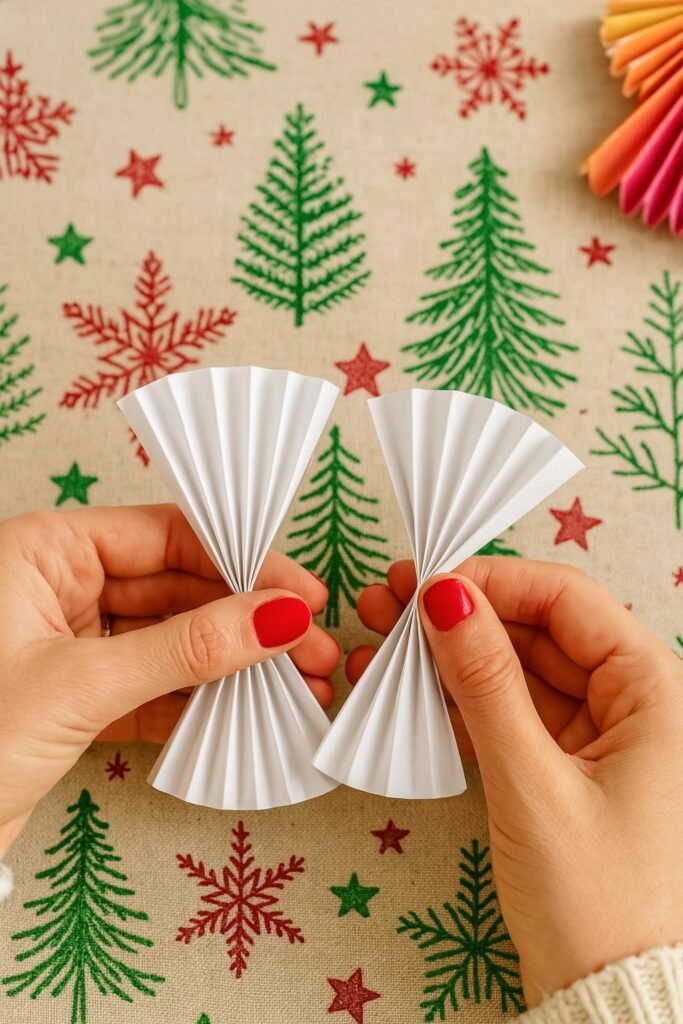
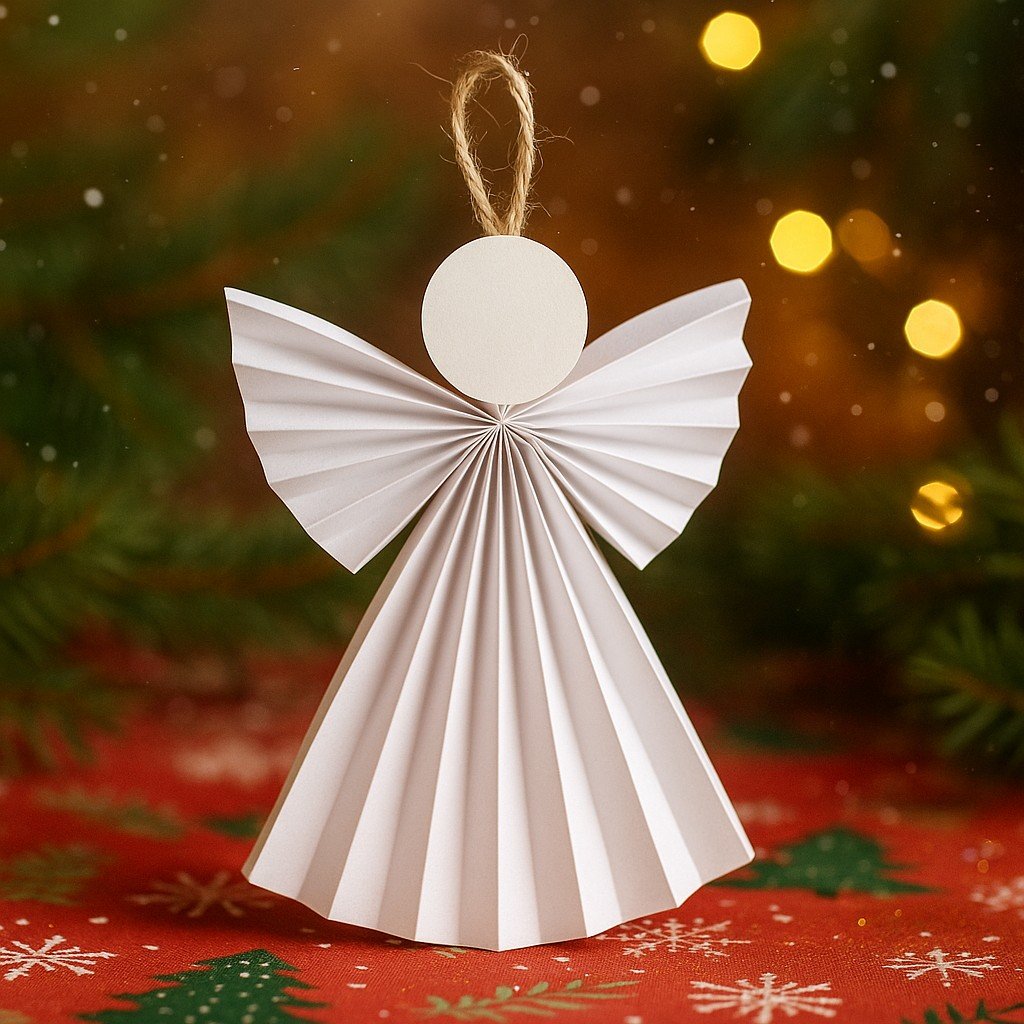
Start by taking a rectangular sheet of white paper and fold it back and forth like an accordion (about 1–1.5 cm folds).
Now fold your accordion-folded paper not at the center, but about one-third of the way along its length. This will give your angel two different-sized wings — the larger section will become the skirt, and the smaller part will form the wings.
Hold them together at the fold — you can secure it with a tiny dot of glue or just pinch it for now.
Tip: If you want to skip decorating later, use colored or patterned paper right away — gold foil or sparkles look magical!
Prepare a loop: Cut a small piece of twine, string, or matching paper strip and form it into a loop.
Glue it in place: Sandwich the loop between the top edges of your two folded paper sections (the wings and the skirt). Make sure the ends are tucked in securely so it holds well.
Cut out a circle from colored or glittery paper (about the size of a coin), and glue it right where the wings and skirt meet — just like in the picture.
4. Meaningful Christmas Handprint & Fingerprint Keepsake Crafts
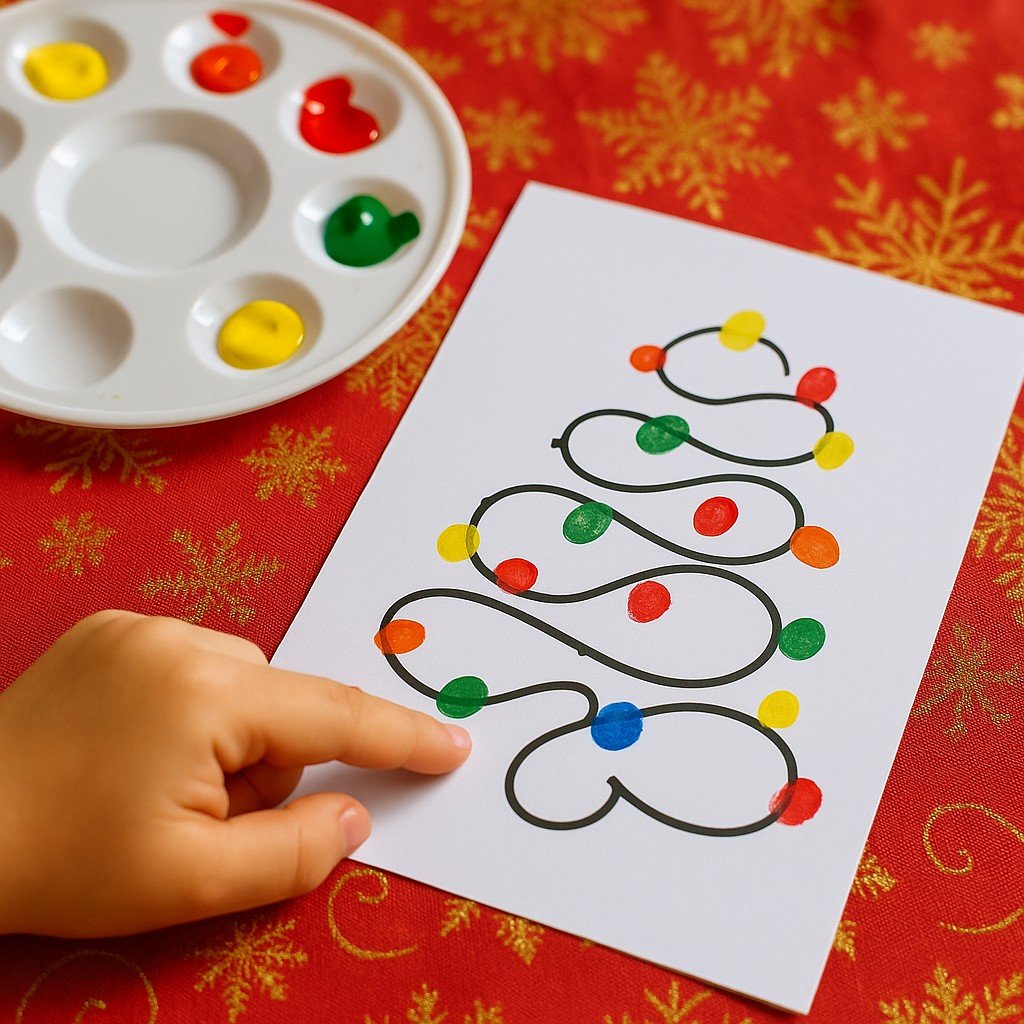
Christmas lights
Steps:
- Draw the tree outline
Use a black marker to draw a continuous wavy or spiral line in the shape of a Christmas tree on the white paper. This line will represent a string of lights. - Set up the paint
Pour small amounts of red, yellow, green, orange, and blue paint onto a paint palette. - Start stamping
Dip your finger into one of the paints and press it gently onto the line you drew, mimicking Christmas light bulbs. - Add colorful “bulbs”
Continue stamping different colors all along the black line until the tree is decorated with bright, festive fingerprints. - Let it dry
Allow the paint to dry completely. Once dry, your fingerprint Christmas tree is ready to display!
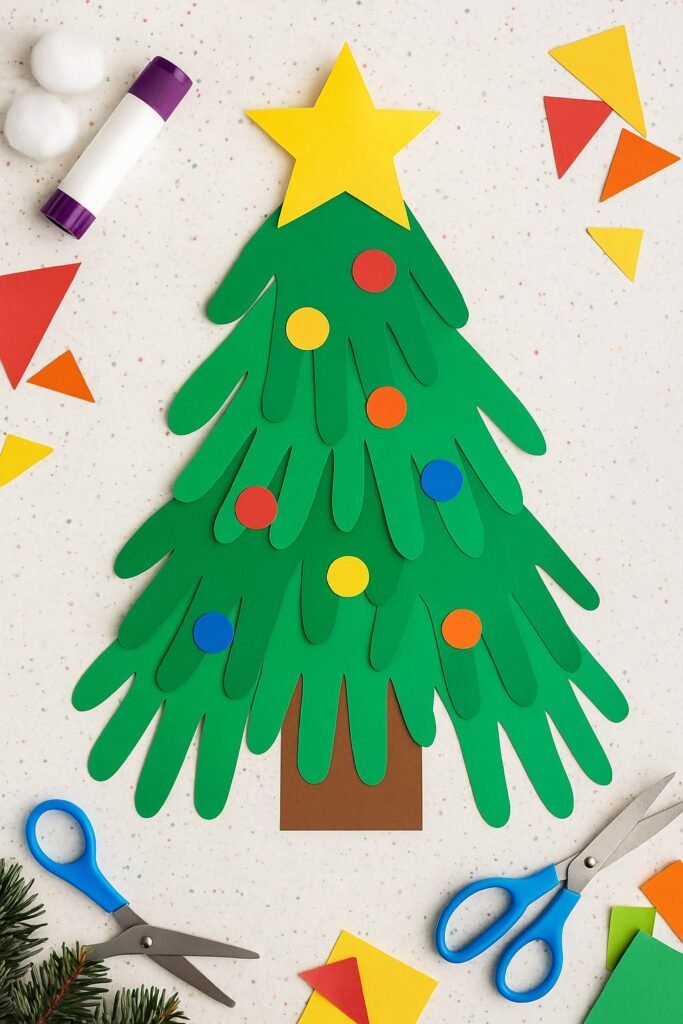
Handprint Christmas Tree
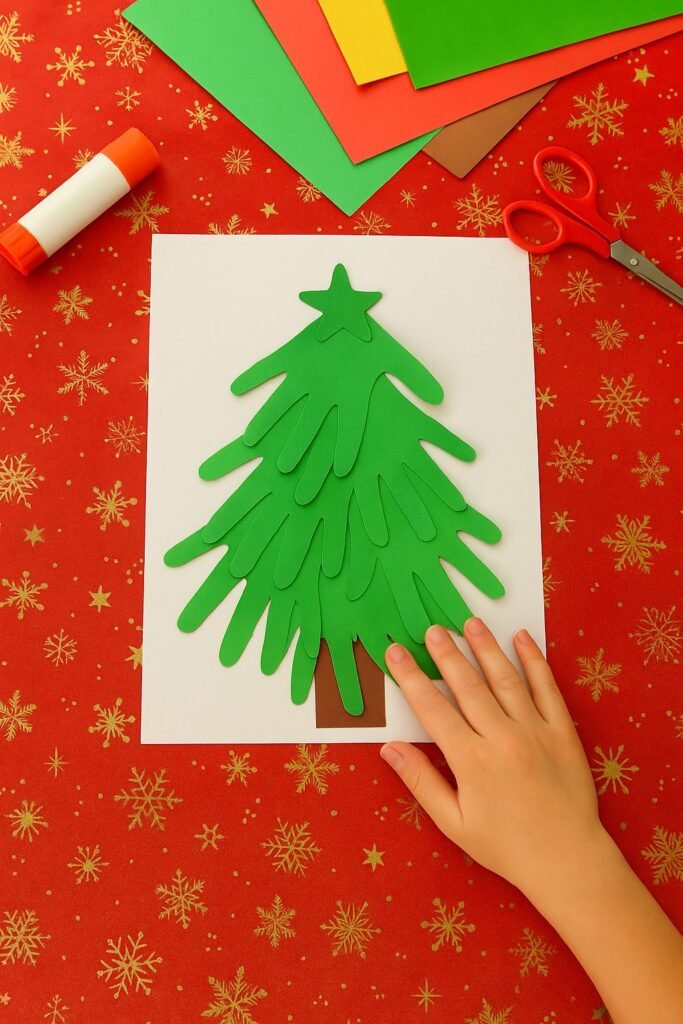
- Arrange the handprints in layers, with the fingers pointing outward and downward, slightly overlapping each other to resemble the shape of a Christmas tree. Glue them in place. Add a small brown rectangle at the bottom as the tree trunk.
- Cut out colorful paper circles and a star from yellow paper. Glue the circles onto the tree as ornaments, and place the star at the top.
handprint snowman
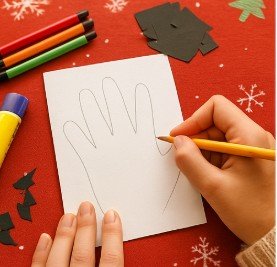
1. Fold a piece of white cardstock in half.
Place your hand on the paper so that your pinky finger is lined up with the folded edge. Trace around your hand.
2. Cut out the hand shape.
When you unfold it, you’ll have a handprint-shaped card that opens up like a little book.
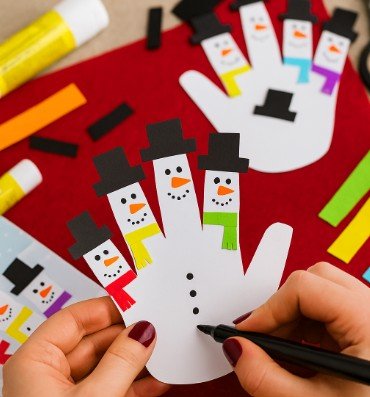
3. Make snowman hats.
Draw a small top hat on black paper and cut it out. Use it as a template to trace four more. (Tip: fold the paper to cut two at a time.) Glue the hats to the tips of each finger.
4. Add snowman faces.
Use a black marker to draw eyes and smiling mouths. Then grab an orange marker and draw cute carrot noses — pointing in different directions adds charm!
5. Create mini paper scarves.
Cut small rectangles of colored paper to fit the fingers. Snip one end to create fringe, then glue each scarf onto a snowman’s “neck.” Try turning the pinky and thumb scarves the opposite way for fun.
6. Draw buttons.
Just below the scarves, draw two or three little buttons with a black marker.
7. Write a sweet message inside.
Your snowman handprint card is ready to share! This craft is super simple and needs only a few supplies — perfect for family gifts or even as adorable gift tags.
Why Making These Christmas Crafts Is More Than Just Fun
These festive DIYs aren’t just cute decorations or handmade gifts—they’re actually wonderful tools for development, creativity, and connection. Whether you’re crafting a Christmas lights garland, a cupcake wrapper tree, a paper cup Santa, or a handprint snowman, you’re doing much more than filling time.
Here’s what these activities really support:
Fine motor skills
Cutting, folding, gluing, and sticking all help children strengthen their hand muscles and coordination—essential for everyday tasks like writing or zipping up coats.
Sensory exploration
The feel of soft cotton balls, smooth paper, bumpy glitter, or sticky glue engages the senses in a gentle and enjoyable way.
Focus and patience
Step-by-step crafting encourages kids to slow down and concentrate, helping them build attention span in a calm, playful environment.
Planning and sequencing
Following instructions—whether verbal or visual—teaches children to think in order: first we fold, then we glue, and finally we decorate.
Confidence and independence
Finishing a craft project gives kids a powerful sense of achievement. “I made this!” becomes a proud moment that boosts self-esteem.
Emotional connection
Crafting together creates moments of shared joy, relaxed conversation, and real togetherness. No fancy tools needed—just a little time and attention.
Even if the snowman’s eyes are uneven or the garland doesn’t hang straight, it doesn’t matter. These creations are beautiful because they are handmade, heartfelt, and entirely their own.
So go ahead—get the scissors, paper, and glue. You’re not just decorating for the holidays. You’re building skills, memories, and joy.
A Quick Note on Safety
As with any craft or activity, never leave young children unsupervised, especially when using scissors, glue, small objects, or anything that could pose a choking hazard.
Even the simplest play can get unexpectedly messy (or inventive 😊), so make sure the space is safe, and all materials are age-appropriate.
And hey — part of the fun is doing it together, right?

If you love planning every delicious detail of the holidays, grab your FREE 20 pages printable Christmas Food & Drink Planner PDF to keep meals organized, stress low, and the treats flowing.

The Real Magic? It’s Not in the Paper — It’s in the Moments.
Sure, these crafts are made from paper, glue, googly eyes, and maybe a desperate hope that the glitter stays on the table.
But what you’re really building here isn’t just a garland or a snowman card.
You’re building memories. Micro-moments of connection. Ten quiet(ish) minutes where your child gets to say, “Look what I made!” and you get to say, “I see you.”
So don’t stress about the perfect cut or the Pinterest-worthy photo.
Sit down beside them. Pass the safety scissors. Laugh when the eyes end up on the snowman’s belly. Let it be wonderfully imperfect.
Because the truth is, your presence is the gift.
You, showing up with a glue stick and a smile.
You, cheering for a paper reindeer with two different-sized antlers.
You, making space for their creativity—even if the kitchen looks like a craft store exploded.
And trust me: years from now, they won’t remember the exact craft.
But they will remember that you sat with them. That you made it matter.
And that? That’s the kind of Christmas magic no store-bought kit can match. ❤️❤️💜💜
Don’t miss these extra fun crafts—they’re just too cute (and too easy) to skip!
Each and every Unique Mamma deserves a little expert support!
So Let’s keep in touch!
You’ll find plenty more on my Pinterest — follow me there too!
Be the first to know about my the latest contents.
Subscribe to my NEWSLETTER!
I would be happy if you would share your thoughts and questions.
Leave a comment or message!
E-mail: timea.klement@uniquemammas.com
Note: This post may contain affiliate links. As an Amazon Associate I earn from qualifying purchases. Please see Disclaimer policy for more information.